Sort the tools before the mud hardens
At the end of a muddy gardening session, gather the hand tools in one safe place before they disappear into different corners of the yard. Set sharp edges where nobody will accidentally grab or step on them.
Separate ordinary hand tools from powered equipment and anything with its own special cleaning requirements. This routine is for suitable manual tools, with each manufacturer's instructions taking priority.
Look for damage as you sort: a split handle, loose head, bent part, or broken latch deserves attention beyond surface cleaning. Put an unsafe tool aside rather than returning it to the normal ready-to-use group.
Choose a working area where removed soil and wash water can be handled appropriately. Keep the cleaning setup away from food preparation, electrical equipment, and a route children or pets need to use.
The first goal is to remove ordinary soil and debris so you can see what you are working with. Cleaning and disinfection are related tasks, but they are not interchangeable names for the same step.
Read the materials and the instructions
Identify which parts are metal, wood, plastic, rubber, or another material. A tool that looks simple may contain a spring, bearing surface, coating, or grip that needs particular care.
Read the manufacturer's cleaning and maintenance directions when available. Confirm whether you may rinse the tool, remove a component, lubricate a joint, or apply a protective treatment.
Do not immerse a tool simply because it has no motor. A wooden handle, enclosed joint, or attached grip can still be affected by water in ways you cannot see immediately.
Keep any assembly information available before removing screws or small parts. If normal owner maintenance does not require disassembly, do not turn cleaning into an unnecessary repair project.
For an unidentified older tool, begin with a cautious approach and seek appropriate guidance. An uncertain material or damaged finish is a reason to avoid aggressive methods until you understand it better.
Remove soil before thinking about disinfectant
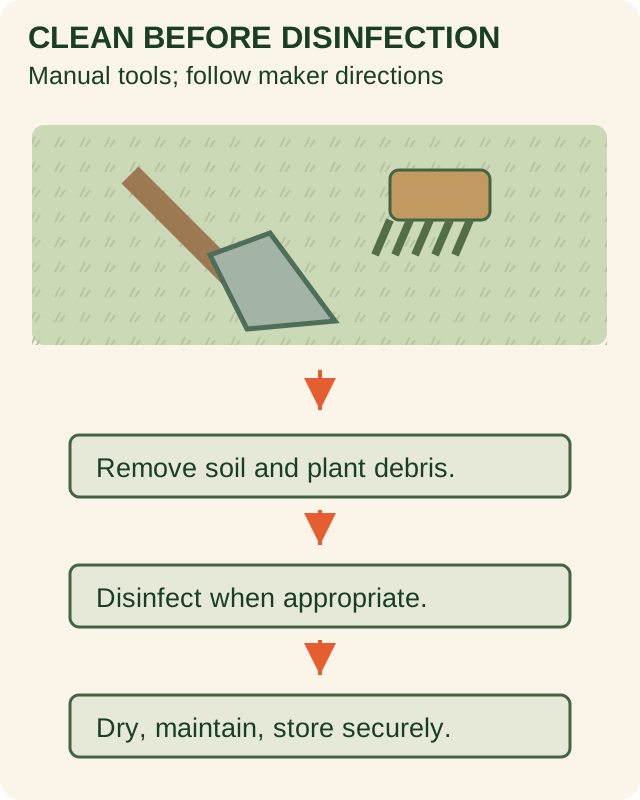
Use an appropriate brush or other permitted tool to remove loose soil and plant debris. Work carefully around cutting edges rather than wiping toward a blade with an unprotected hand.
If the maker permits water cleaning, use it in a controlled way and avoid leaving parts soaking unnecessarily. Pay attention to crevices where soil can remain after the broad surface looks clean.
University of Minnesota Extension explains that soil and plant material should be removed before disinfection. That matters because a visibly muddy surface is not ready for a product intended to act on the cleaned tool.
Inspect hinges, serrations, blade backs, and the joint between head and handle. You do not need to polish away every age mark, but you do need to notice material trapped where ordinary rinsing misses it.
Change a dirty cleaning cloth or water arrangement when it stops helping. Moving mud from one part of the tool to another is activity without much progress.
Decide whether disinfection is appropriate
Think about what the tool contacted during the session. Work around suspected infected plants, movement between gardens, and other relevant situations may call for disinfection under suitable horticultural guidance.
Minnesota Extension notes that plant pathogens can travel with soil and plant material on tools. Use that context to make a specific decision rather than assuming every tool needs the same treatment after every task.
Choose a product and method appropriate for the material and purpose, following its current label. Contact time, compatibility, handling, and disposal requirements should come from those actual instructions.
Do not invent a stronger mixture or combine products. Wear any required protective equipment, provide the specified conditions, and keep the work away from people or animals who could be exposed.
If you are unsure how to manage a suspected plant disease, ask your local extension service for relevant guidance. The right cleaning decision depends partly on understanding the problem you are trying to avoid spreading.
Dry the hidden places as well as the blade
After the permitted cleaning or treatment, follow any required rinse and drying directions. Open movable parts only as the tool's design allows so you can reach damp surfaces without forcing the mechanism.
Use a suitable cloth and allow remaining moisture to leave in an appropriate location. Check the underside of a handle, the area around a fastener, and the inside of a permitted-to-open joint.
Do not put a damp tool straight into a closed sheath or tightly packed storage bin. The surface you can see may look ready while a less exposed part still needs attention.
Keep sharp tools arranged securely while they dry. A blade balanced on the edge of a workbench creates a different problem from the one you just cleaned.
If weather interrupts the process, move the tools to a suitable sheltered place. Planning that location ahead of time helps you avoid storing them wet simply because the patio has become inconvenient.
Maintain only what the maker allows
Once the tool is clean and dry, follow its directions for lubrication or surface protection where applicable. Use a suitable product in the stated places rather than coating every material indiscriminately.
Keep lubricant away from grips or surfaces where it would make handling slippery. A well-maintained cutting tool should still be secure in your hand during ordinary work.
Check normal adjustment points according to the manual. A loose connection may need an approved adjustment, but a damaged load-bearing part should not be disguised with extra tightening.
Sharpening is a separate skill with tool-specific requirements. If you do not know the correct method or the edge is damaged, arrange appropriate service instead of grinding away material during a rushed cleanup.
Record any replacement part or repair you need. Returning a questionable tool to storage without a note makes it easier to forget why you were concerned when you pick it up next weekend.
Give each tool a dry, accessible place
Choose storage that keeps tools secure, dry, and easy to identify. Follow the manufacturer's requirements for guards or sheaths after the tool has finished drying.
Use supports that suit the tool's weight and shape. A hook that barely catches a handle is less useful than a stable arrangement that will not release the tool when another item is moved.
Keep sharp edges away from casual reach, particularly where children may access the storage area. Separate chemical products and other supplies according to their own storage instructions.
Leave enough space to remove one tool without pulling several others forward. Crowded storage can damage edges, hide moisture, and turn a quick task into a search through a pile.
Store a small cleaning kit nearby if the location is suitable. A brush, cloth, and access to the relevant instructions make the next cleanup easier to start.
Close the weekend with a useful check
Before you put away the last item, count the tools against the group you started with. It is easier to retrieve a missing trowel now than after the next rain covers it with leaves.
Note which tools are ready, which need repair, and which should stay out of use. Give a damaged tool a clear label or separate location so another person does not discover the problem during work.
Review the route from yard to cleaning area to storage. If the process felt awkward, change the layout or reduce the supplies you have to gather rather than abandoning the whole routine.
Check stored tools periodically according to their conditions and care requirements. A dry-looking shed can still change during wet weather or after an unnoticed roof leak.
A good cleanup leaves you with tools whose condition you understand and a place to find them. That practical readiness is the reward for dealing with the mud before the weekend's work becomes next week's mystery.
Sources & further reading
Exact documentation checked October 15, 2026. Original examples and illustrations; no hands-on product testing or professional certification claimed.
- Clean and disinfect gardening tools and containers — UMN ExtensionRemove debris before disinfection; prevent plant pathogen spread; drying and label-specific precautions